
Shopify Review: How To Use Shopify In Thailand [Pros & Cons]
Shopify in Thailand has become increasingly popular as an eCommerce platform for both beginners and experienced entrepreneurs.
Shopify is a popular e-commerce platform that allows businesses to create online stores and sell their products to customers worldwide.
With over 3,000 live Shopify stores in Thailand, it’s clear that the platform is a popular choice for businesses looking to expand their online presence.
But what payment options are available for Shopify in Thailand, and how do you pay for your subscription?
In this article, we’ll explore these questions and more to help you decide if Shopify is the right choice for your business.
- Shopify is a popular e-commerce platform that allows you to create an online store and sell your products or services.
- Shopify offers various payment gateways specifically designed for the Thai market, making it easy for you to accept payments from customers in Thailand.
- Shopify offers a 3-month free trial for just $1 each month to test the platform for your business.
What is Shopify?
Shopify is an all-in-one eCommerce platform that makes it easy to launch your dream business and start selling to your customers.
It’s a complete solution for entrepreneurs who want to easily build their own online store with no technical skills needed.
Shopify is one of the best-known eCommerce platforms and has become the most popular choice for online stores.
It’s a large e-commerce hosting platform headquartered in Ottawa, Canada, and has exploded over the past decade.
It has become a staple for online retailers worldwide, being present in Thailand also.
Several Shopify websites in Thailand are reaping the benefits of gaining a self-hosted, easy-to-navigate platform for their online brands, and this number is expected to grow.
Is Shopify Available in Thailand?
Yes, Shopify is available in Thailand. In fact, it is one of the most popular e-commerce platforms in the country.
Shopify is a global e-commerce platform that allows you to create an online store and sell your products online.
It has a strong presence in Thailand, with many local businesses using the platform to sell their products online. You can use Shopify to sell physical, digital, and services.
The platform offers a wide range of features and tools to help you manage your online store, including payment processing, shipping and fulfillment, and marketing and analytics.
One of the benefits of using Shopify in Thailand is that the platform fully complies with local regulations and laws.
This means that you can use Shopify to sell your products online without worrying about legal issues or compliance requirements.
How Does Shopify Work in Thailand?

As I’ve mentioned earlier, Shopify is basically good for newbie entrepreneurs who are just getting started with the eCommerce business.
You really don’t have to know the specifics to get started with Shopify in Thailand.
To use Shopify in Thailand, you must sign up for a free Shopify account, and the Shopify wizard will take you through the whole process.
To start using Shopify in Thailand, you’ll have to have a product you want to sell. Once you have that, upload your product pictures, the shipping order, and the product quantity.
The Shopify platform supports two popular ways of selling online. The first is having your product inventory yourself, and the other is through dropshipping
Who Can Use Shopify in Thailand?
Basically, any eCommerce entrepreneur in Thailand can use the Shopify store to sell their products online.
So technically, depending on what brand or niche you focus on around physical or digital products, Shopify can be your safe haven.
below are samples of what you can use your Shopify store to sell online (Both physical and digital products)
- Fashion
- Art
- Jewellery and Accessories
- Electronics
- Foods
- Memberships
- Home and Garden
- Furniture
- Sport and Recreation
- Toys and Games
- Service appointments
- Craft
- Books
- Consultations
- Quotes, estimates, and assessments
- Rentals
- Donations
- Event tickets
- Digital gift cards
- And much more…
How To Sell on Shopify in Thailand
Selling is the process of marketing products online, including everything from marketing, advertising, order management, shipping, and more.
Using social media and SEO (search engine optimization) is extremely important if you want to attract new customers to your Shopify website. They work together, so use both to your advantage.
You can maximize your SEO potential by including accurate product descriptions and other content that has relevant keywords.
It takes a bit of time to build up some momentum, but eventually, you’ll start to see a few new visitors to your site.
Shopify offers multiple features to help you get the word out there about your online store.
You can use different Shopify marketing apps such as Facebook channel and SEO Suite to post on social media and track your analytics and SEO.
Many apps are actually free and can be used effectively to create great marketing and advertising campaigns.
Step 1: Create Your Shopify Account
To get started, you need to create a Shopify account. Go to the Shopify website and click on the “Get Started” button.
Normally, on the Shopify website, you’ll get access to a 14-day trial that you can use to explore Shopify.
But if you go through this Shopify promo page, you’ll gain access to a 3-month free trial for $1.
So to get started, head over to the Shopify promo page to create your Shopify account.
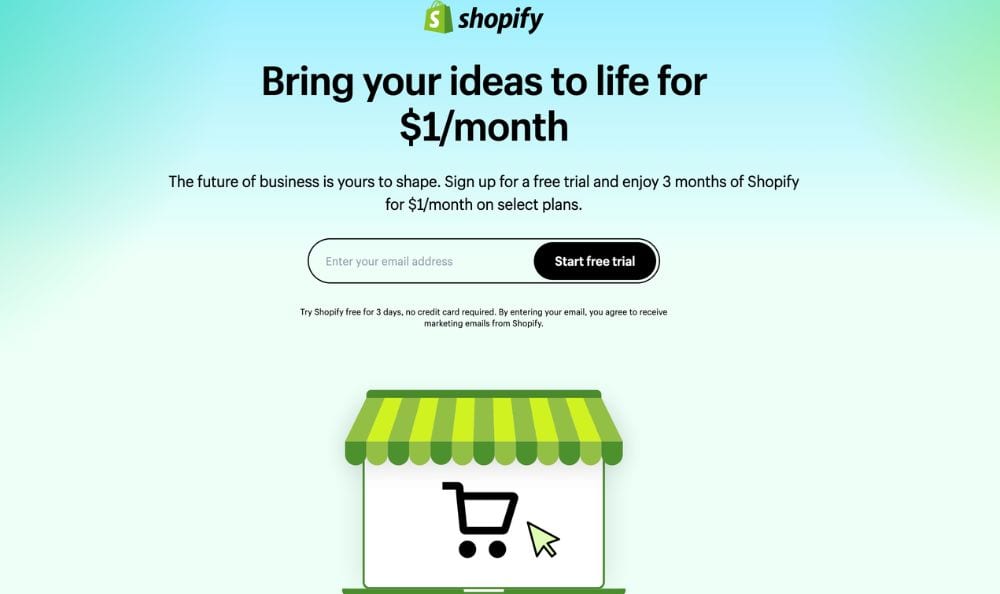
Enter your email address. Once you’ve done that, click “Start Free Trial” to proceed. After doing that, you’ll be taken to the next page.
So here, Shopify will work you through a short question process and answer with what best describes you.
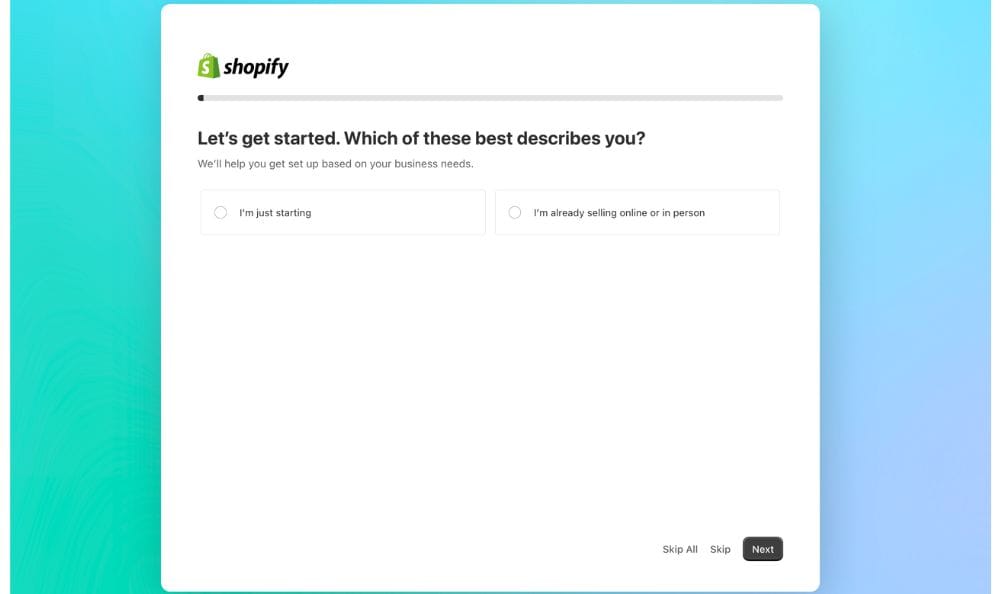
It doesn’t matter if you’re write or wrong just choose the best one that describes you. Once you’ve done that, Click next and it will take you to the next page.
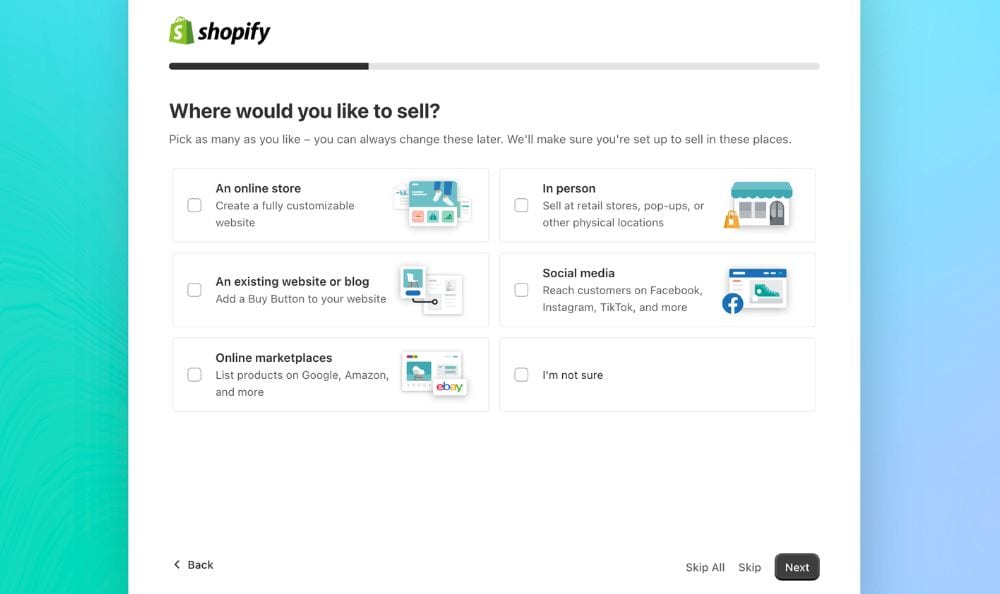
Just choose an online store since you want to use Shopify to create an online store. And not, just choose what best what you want to use your Shopify store for.
Again, it doesn’t matter if you choose right or wrong answer, it’s just a questionnaire for Shopify research purposes.
Once you’ve chosen where you’ll to sell to sell, click the next button.
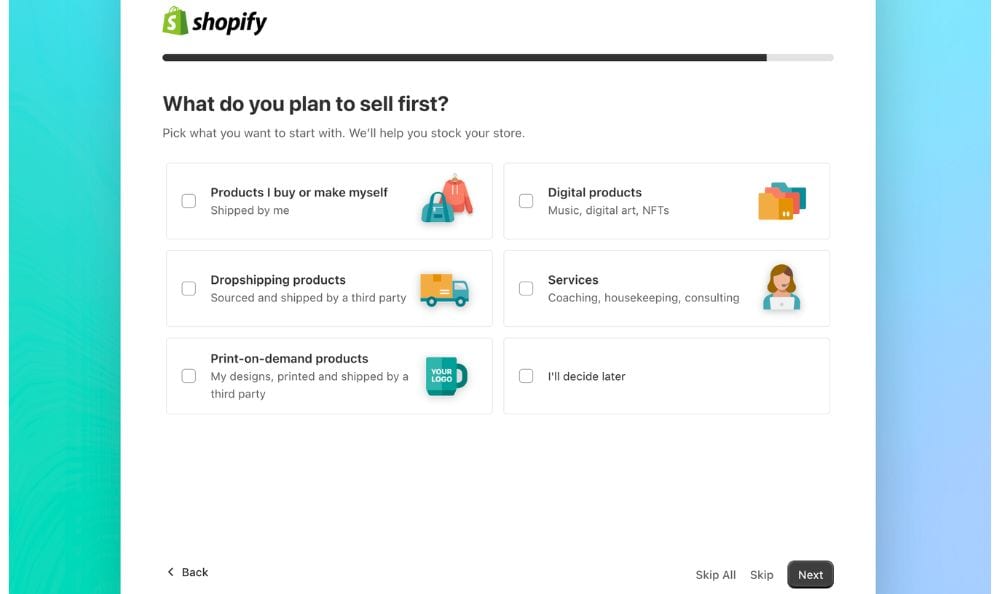
Choose what best describes your Shopify business, whether for dropshipping in Thailand, selling digital products, or even print-on-demand products you buy and want to resell online.
The next page will ask where you’ll open your Shopify store. Choose your country from the dropdown menu.
But note your Shopify store will be limited to the country you choose in terms of some functionality. Like payment gateway available in that country or other marketing app.
For example, Shopify payments is only available in the US and few other countries.
So chose your country and click the next button to create your Shopify store and login to your Shopify account.
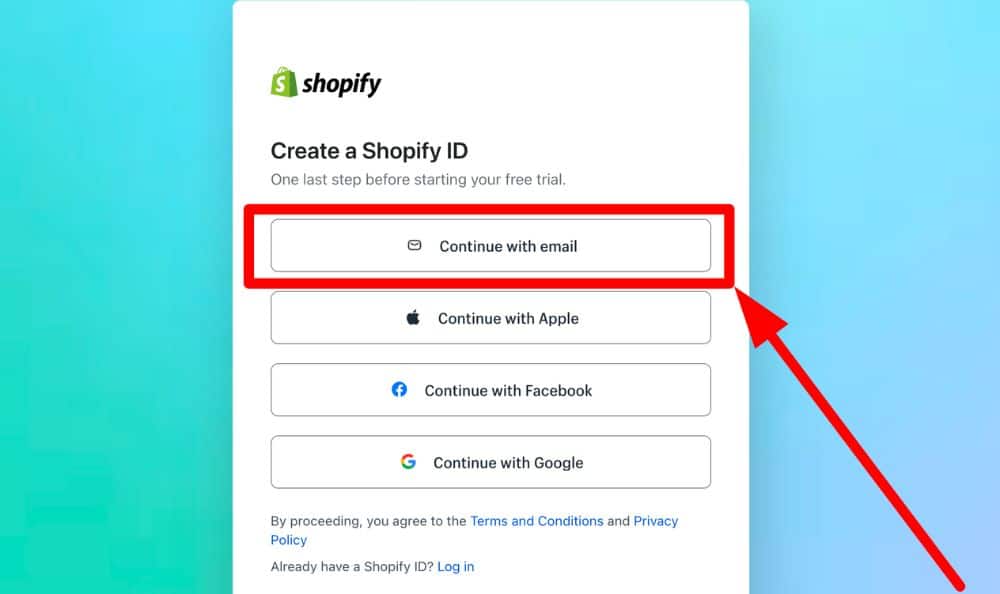
Click on continue with email address, the next page will ask you to enter the password you’ll like to use.
Enter your password and your Shopify account will be created. Once it’s created you see your dashboard like this…
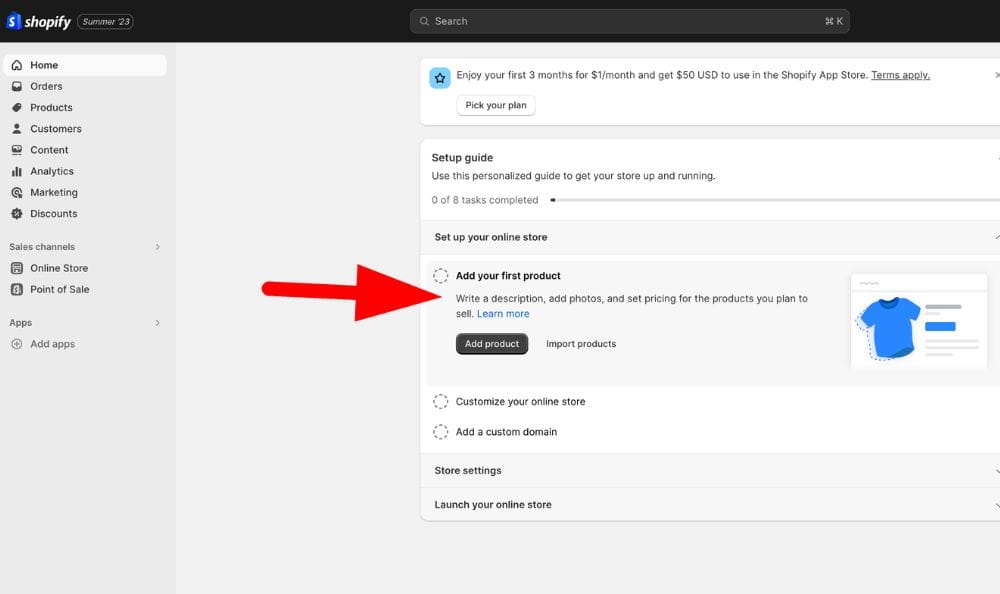
Once in your Shopify dashboard, you’ll see the step of things you have to do. Like picking a pricing plan, adding a product and customising your Shopify store.
Step 2: Adding Products to Your Store
Once you’ve created your store, you can start adding products.
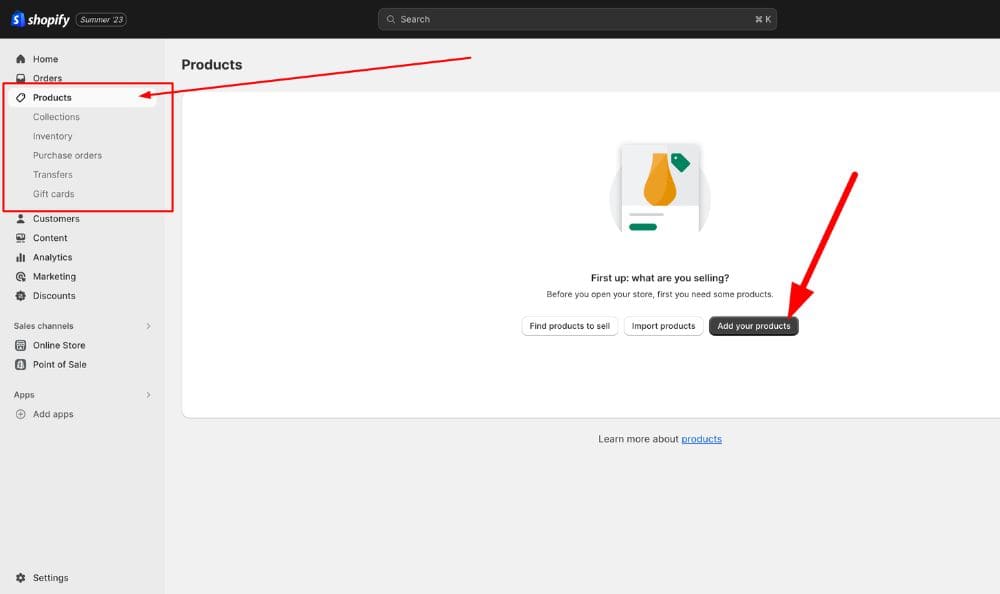
From you dashboard from the left hand-side click on the “Products” tab and then click “Add product” to add a new product.
Once you’ve click on add products you’ll be prompted at the next page to enter the product’s name, description, price, and other details.
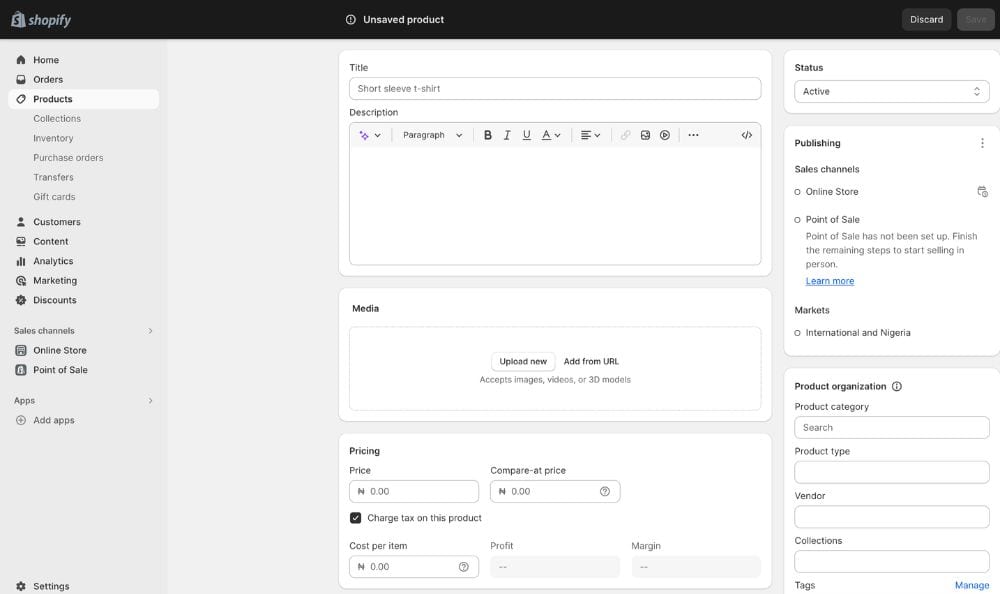
You can also upload images of your products to make them more appealing and add pricing.
If the product have any variant, you can also add them here.
Step 3: Designing Your Shopify Store
You can start designing your store after creating your account and adding products.
Shopify offers a wide range of themes and templates that you can use to customize your store’s design.
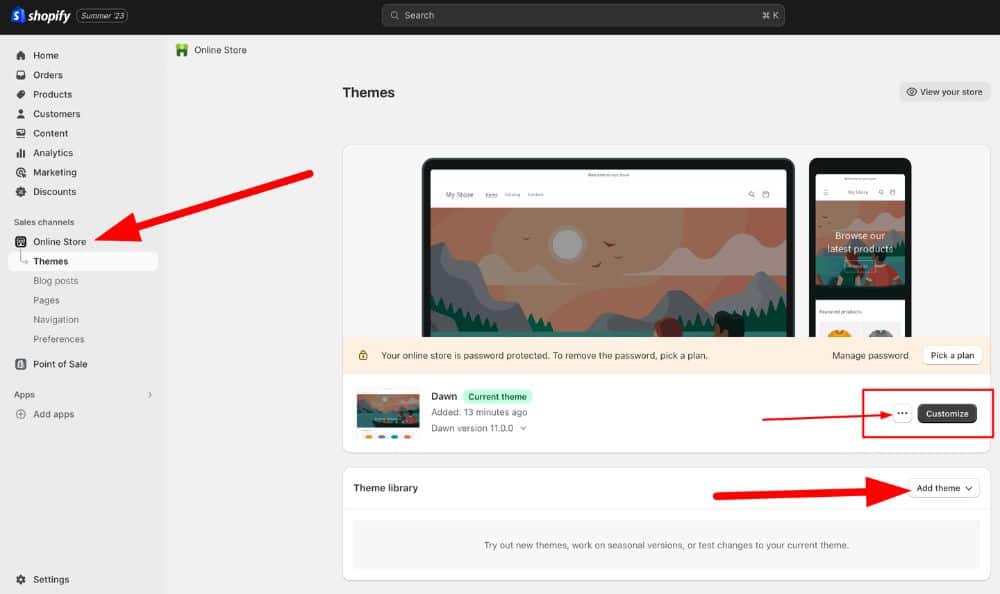
From the left side of your dashboard, click “Online Store.” it will bring a preview of your store based on the existing design.
Next, you can click on customize to start designing the store.
If you don’t like the existing theme, click on add theme below the customize button or scroll down to choose from the free available Shopify themes.
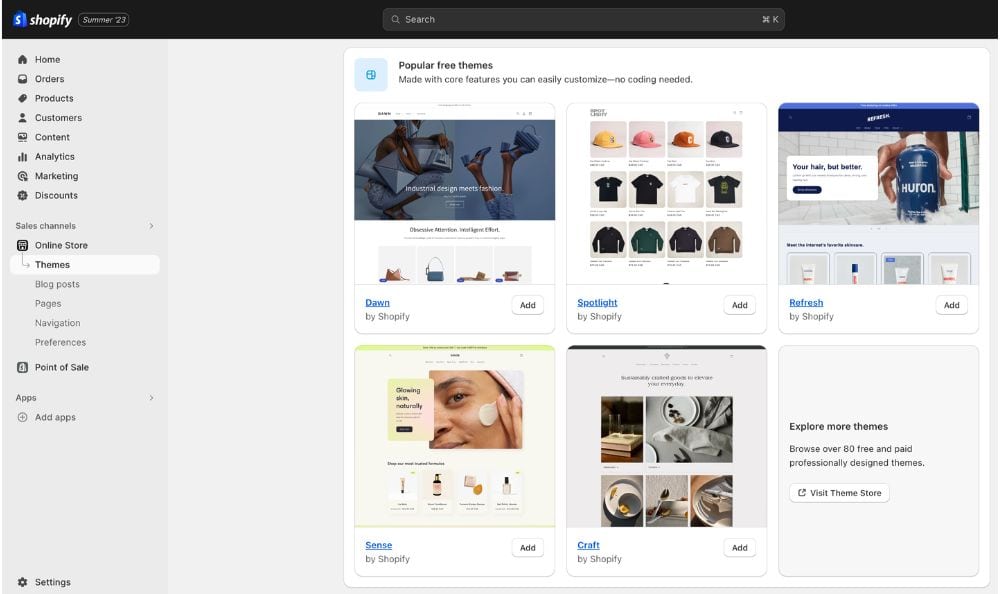
Choose a theme that suits your business and customize it to your liking. You can also add your logo, change the colors, and add images to make your store look more professional.
Step 4: Setting up Payment Methods
To start accepting payments, you need to set up payment methods. Shopify supports a wide range of payment gateways.
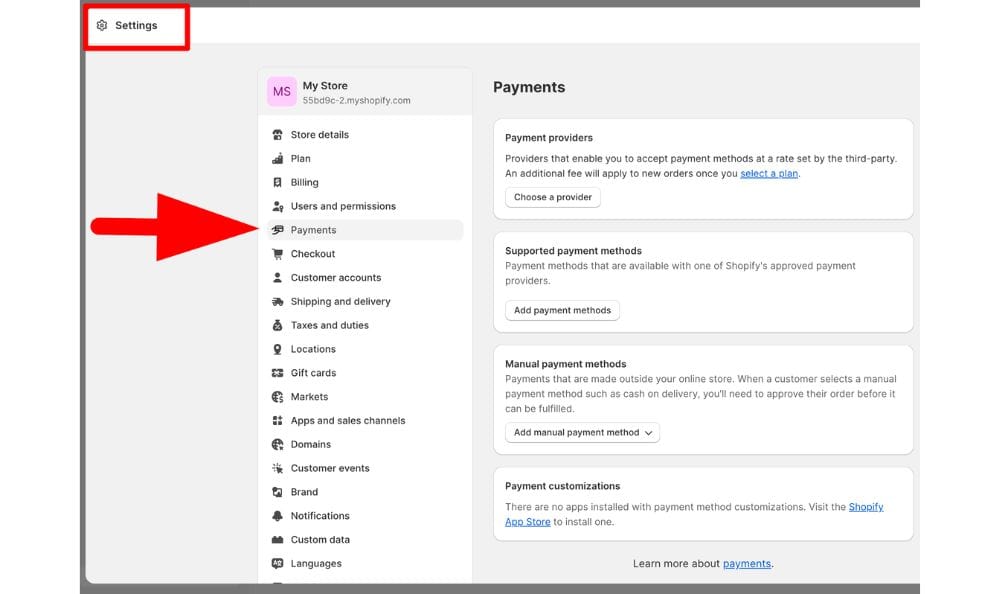
Go to the “Settings” tab and click on “Payment providers” to set up your payment methods.
Step 5: Choosing a Shopify Plan
After adding your products, customizing your store, you’ll need to choose a Shopify plan in other for your store to be visible and start your 3 month trial.
Shopify offers different pricing plans, depending on your business needs. Choose a plan that suits your business and budget.
You can start with the basic plan and upgrade later as your business grows. Once you add your payment details, you won’t be charge until the trials ends.
Step 6: Shipping and Delivery Options
Finally, you need to set up shipping and delivery options. Go to the “Settings” tab and click on “Shipping and delivery” to set up your shipping options.
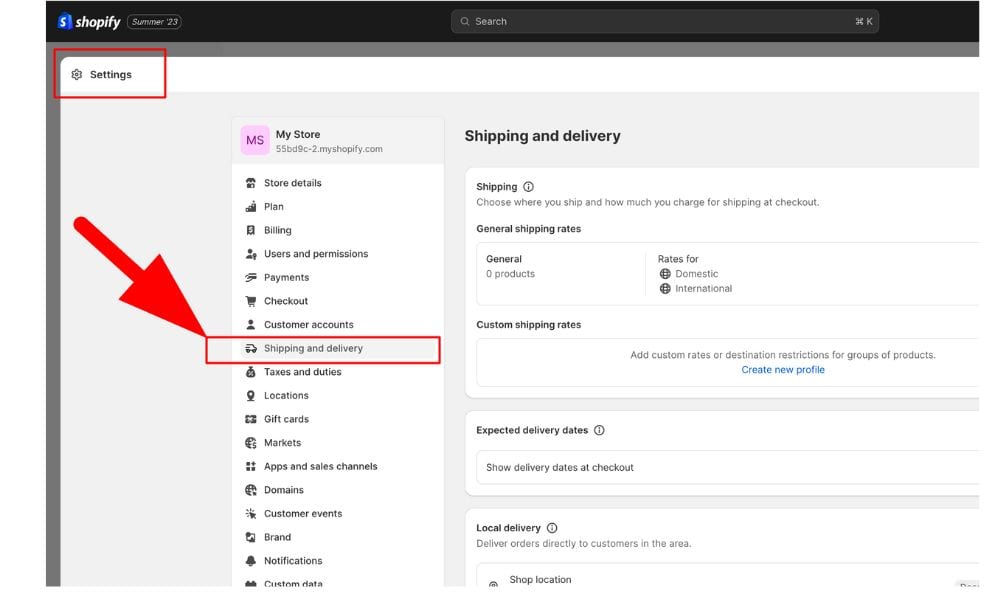
You can choose to offer free shipping, flat rate shipping, or calculated shipping based on weight and destination.
Based on your store business, like dropshipping, your store needs to have a shipping option that caters to all countries you’ll be selling to.
How Do I Pay For Shopify in Thailand?
When it comes to paying for Shopify in Thailand, several options are available to you. Here are some of the most common ways to pay for your Shopify subscription:
1. Credit or Debit Card
One of the easiest ways to pay for your Shopify subscription is by using a credit or debit card. Shopify accepts various cards, including Visa, Mastercard, and American Express.
Simply enter your card details into the payment section of your Shopify account, and your subscription will be automatically renewed each month.
2. PayPal
If you prefer to use PayPal, you can link your PayPal account to your Shopify account. This will allow you to pay for your subscription using your PayPal balance or a linked bank account.
To set up PayPal as your payment method, go to the Payment Settings section of your Shopify account and follow the instructions.
Shopify Pricing In Thailand
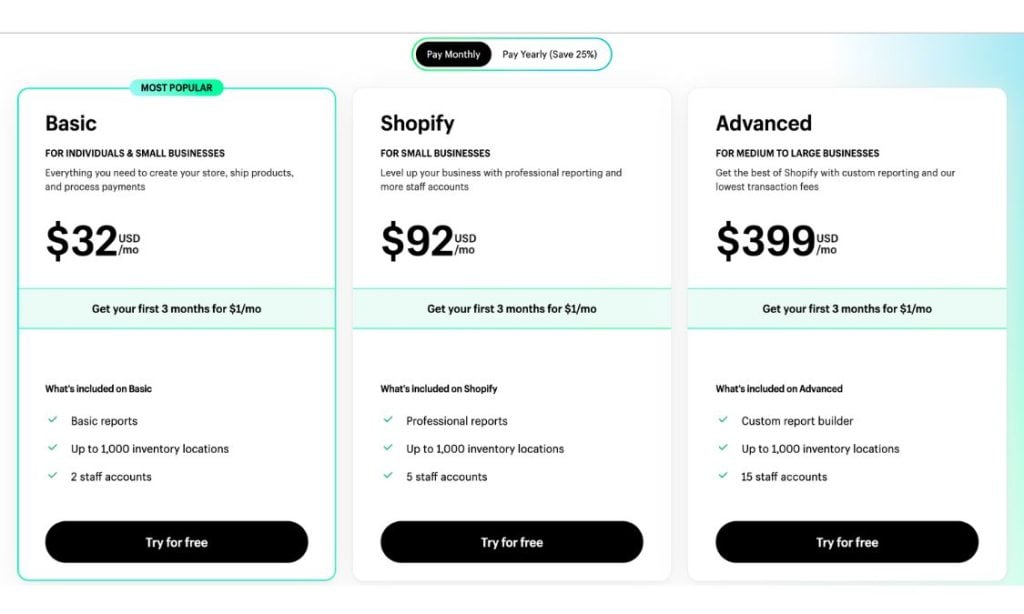
You should know that the monthly cost of selling with Shopify varies based on how many products you sell and other tools needed to run it successfully.
However, before choosing any plan, you have a 14-day free trial to test the platform. You can do this just to get familiarised with the platform and see what works and what doesn’t.
Shopify cost in Thailand comes in different plans.
- Shopify Basic costs $32 monthly (and 2.9% + 30¢ per transaction)
- The Shopify plan cost $92 monthly (and 2.6% + 30¢ per transaction)
- Advanced Shopify cost $399 monthly (and 2.4% + 30¢ per transaction)
Another thing you should know about the plan is that – you get a 10% discount on any plan you choose if you pay straight for a year. And a 20% discount if you pay straight up for two years.
You can purchase additional pricing packages or another pricing package for your Shopify store. They include:
- Shopify Lite lets you sell on an existing website and costs $9/month
- Shopify Plus is designed for enterprises, costing $2000/month
Please also note that there is no charge for manual payment methods on your Shopify store, such as cash on delivery or bank transfer.
What Payment Gateways are Available for Shopify in Thailand?
If you plan to set up a Shopify store in Thailand, you need to choose a payment gateway that can accept customer payments securely and efficiently.
Luckily, there are several payment gateways available for Shopify in Thailand. Here are some of the most popular ones:
#1. 2C2P
2C2P (Cash & Card Payment Processor) is one of the biggest Asian payment gateways accessible in Thailand.
Established in 2003, it assists companies in accepting and transferring payments from millions of clients in a secure way.
2C2P supports various payment methods, including credit cards, debit cards, e-wallets, and bank transfers.
#2. Opn Payments
Opn Payments is another popular payment gateway in Thailand that supports multiple payment methods, including credit cards, debit cards, and bank transfers.
It is known for its fast and secure payment processing and offers competitive transaction fees.
#3. Pay Solutions
Pay Solutions is a Thai payment gateway that offers a wide range of payment options, including credit cards, debit cards, and e-wallets.
It also provides a user-friendly interface and excellent customer support to ensure a smooth payment process for both merchants and customers.
#4. PayPal
PayPal is a global payment gateway that is widely used in Thailand. It supports various payment methods, including credit cards, debit cards, and PayPal balance.
It also provides fraud protection and dispute resolution services to ensure secure and hassle-free transactions.
#5. TrueMoney
TrueMoney is a popular e-wallet in Thailand that can be used as a payment gateway for Shopify.
It allows customers to pay for their purchases using their TrueMoney wallet balance or by linking their bank account or credit/debit card to their TrueMoney account.
Shopify Review in Thailand: Pros and Cons
Let’s explore their strengths and limitations when it comes to selling with the popular Shopify platform.
Shopify Pros
Shopify Cons
Shopify Review in Thailand: FAQs
Let’s look at some of the frequently asked questions about Shopify in Thailand. This will provide more info to queries we haven’t torched in the content.
Are there any restrictions for using Shopify in Thailand?
No, there are no specific restrictions for using Shopify in Thailand. Shopify is available in Thailand and can be used by anyone who wants to start an online store.
Can I use Onepay with Shopify in Thailand?
Yes, you can use Onepay with Shopify in Thailand. Onepay is a popular payment gateway in Thailand that allows customers to make payments using their bank accounts. Shopify supports Onepay as a payment gateway, so you can easily integrate it into your online store.
Is Adyen a supported payment gateway for Shopify in Thailand?
Yes, Adyen is a supported payment gateway for Shopify in Thailand. Adyen is a global payment gateway that supports multiple currencies and payment methods. Shopify has integrated Adyen into its platform, so you can easily set up Adyen as a payment gateway for your online store. Adyen is a great option if you want to accept payments from customers around the world.
Shopify Review in Thailand: Conclusion
In conclusion, Shopify is the best e-commerce platform for businesses in Thailand. It provides businesses with everything they need to succeed online.
One of the biggest advantages of Shopify is its local market integration.
Thailand businesses can easily set up their store, customize their site to their brand, and manage their inventory and orders all in one place.
This makes it easy for businesses to focus on growing their brand and increasing sales.
Additionally, Shopify offers a wide range of apps and integrations that can help businesses streamline their operations and improve their customer experience.

![How To Use Shopify In Germany [The Complete Guide]](https://smartbizfreedom.com/wp-content/uploads/2023/09/Germany.jpg)
![How To Use Shopify In Cambodia [The Complete Guide]](https://smartbizfreedom.com/wp-content/uploads/2023/09/Shopify-Cambodia.jpg)
![How to Start an E-commerce Business in Nigeria [Full Guide]](https://smartbizfreedom.com/wp-content/uploads/2022/08/Image-35.jpg)
![Shopify Reviews 2025: How Shopify works in Nigeria [Pros & Cons]](https://smartbizfreedom.com/wp-content/uploads/2022/08/shopify.jpeg)
![Shopify Review: How To Use Shopify In Malaysia [Pros & Cons]](https://smartbizfreedom.com/wp-content/uploads/2023/09/Malaysia.jpg)