How To Open A Payoneer Account In Nigeria [Get $50 Bonus]
In today’s post, I’ll show you exactly how to create a Payoneer Account in Nigeria and receive international payments online.
The truth is, if you’re like me that receive multiple payments online then you definitely need to set up a Payoneer account for yourself.
With Payoneer, you can easily receive payment from any part of the world once you have a verified Payoneer account.
They make it possible for you to have virtual bank detail that can receive payment from any part of the world.
Not just that, it also comes with your own unique MasterCard or Visa Card that you can use to shop online without limitation.
Being in counties like Nigeria comes with a few limitations like limited access to Paypal or Stripe.
But thanks to Payoneer, amidst this limitation you get to receive funds easily with Payoneer and have them withdrawn directly to your local bank account.
So in today’s post, I’ll show you exactly how to open a Payoneer account in Nigeria. Then also show you a few other stuffs you can do with your account.
But before that, let’s have a little chat about Payoneer for those that don’t really understand how it works.
Let’s get started, shall we?
What is Payoneer?
Payoneer is basically a financial service that provides online money transfers from B2B or B2C via the digital payment services platform.
Founded in 2005 in New York City, United States, Payoneer has been able to accumulate over 5million plus customers using the platform.
Their goal is to empower anyone, anywhere in the world to participate and succeed as a global citizen of a single digital economy.
This simply means irrespective of your location; you shouldn’t be limited to receiving payment from your clients or online business.
The best part, is you also get to own your unique MasterCard that can withdraw money from any dollar print ATM.
Several big websites and companies like Google, Facebook, Amazon, Fiverr and many others accept Payoneer cards as part of their trusted means of payment.
So if you’re a Blogger, Digital marketer or even freelancer in Nigeria, be rest assured that you can receive payment online with Payoneer.
Now that we understand what Payoneer is, let’s look at the requirement for opening our personal account.
Requirement for Creating a Payoneer Account in Nigeria
So if you’re ready to create your Payoneer account, below are the requirements:
- Your Legal Name (As Shown in Your Bank Account)
- Email Address
- ID Card
- Home Address
- Phone Number
- Bank Details
Once you have everything above, you can proceed to set up your verified Payoneer account in Nigeria.
How To Create A Payoneer Account In Nigeria
Below are the necessary steps you need to successfully create your account. As our reader bonus, you’ll get $50 sign-up bonus with the sign-up link on this BLOG.
Exclusively for our blog readers.
Step 1. Head Over To Payoneer
First thing first, you need to get over to Payoneer.com to get started. Upon getting to the home page
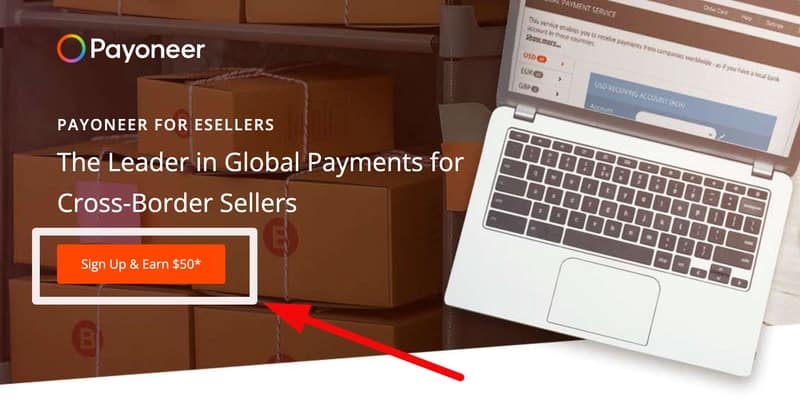
Click on the orange button that is tagged with “Sign Up & Earn $50”, and you will be redirected to the next page below.
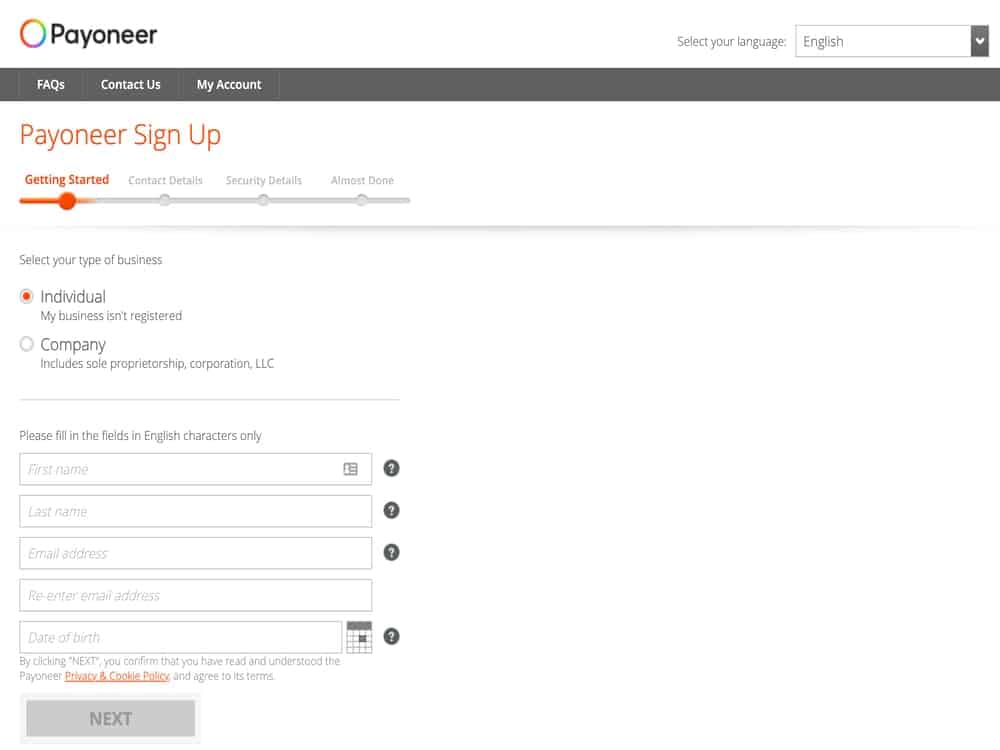
Both of the option provided above is still for a business account because you can only use Payoneer for a business account. However, the first option referred to a business account that is not registered.
While company accounts are businesses that are incorporated or limited liability companies.
In your own case what you need to choose is the first one which is the business account. This is easy because it requires less paperwork and your account will be activated immediately.
So enter your details, to proceed to the next page.
Step 2. Provide Your Contact Details
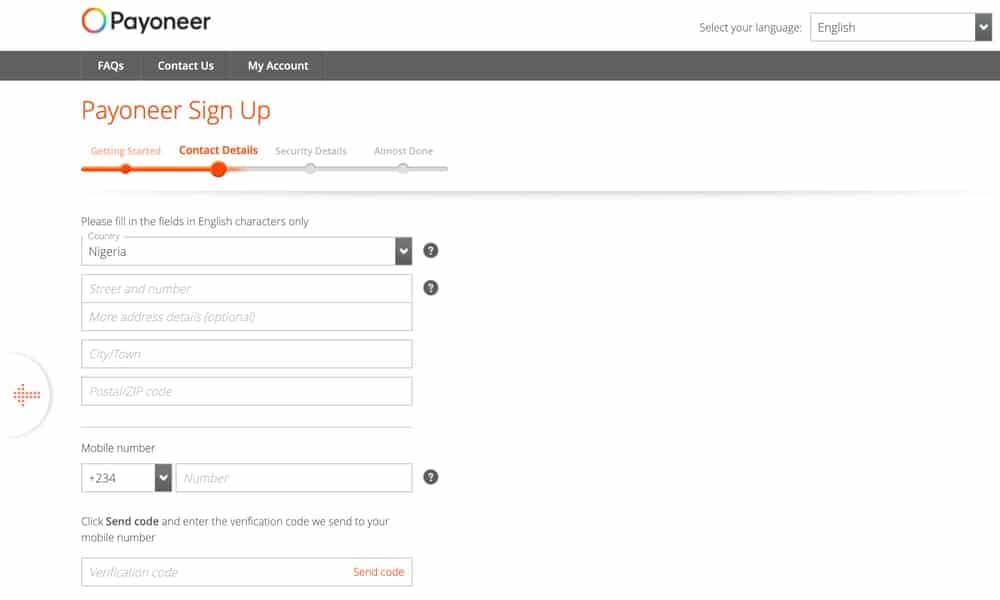
At this stage, what you need to do is enter your contact details, this includes your house address, city and postal code.
After that, enter your mobile number to receive your verification code in other to proceed to the next stage. Once you receive the verification code enter it in the space provided and continue to the next step.
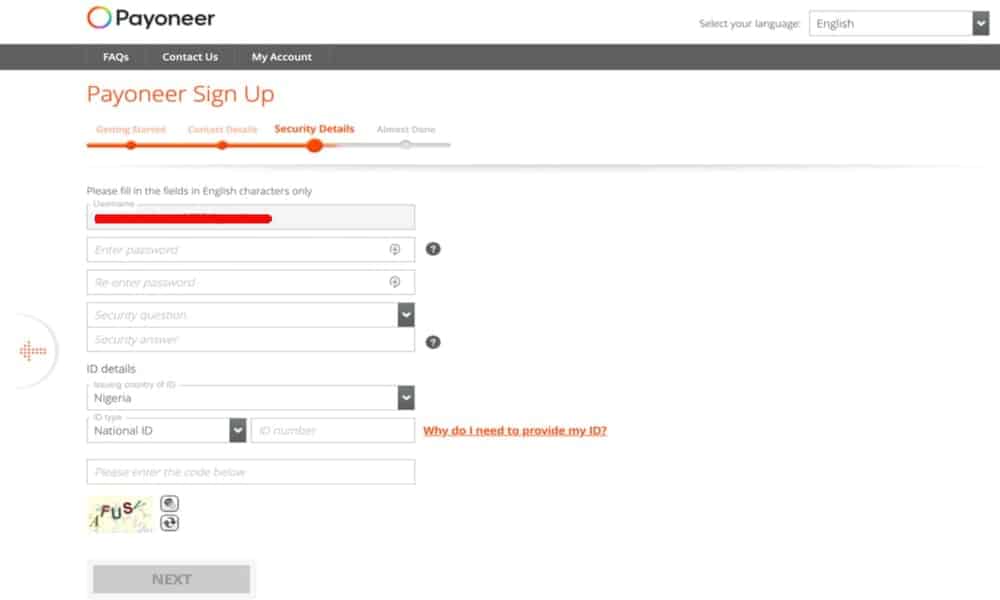
Step 3. Provide Your Security Details
After that, choose your means of identification. This could be your national ID, Drivers license or passport.
Whichever you choose, you’ll have to enter the ID number in the space provided as you can see in the image above. After that, enter the text and click next to proceed to the next stage.
Step 4. Provide Your Bank Details
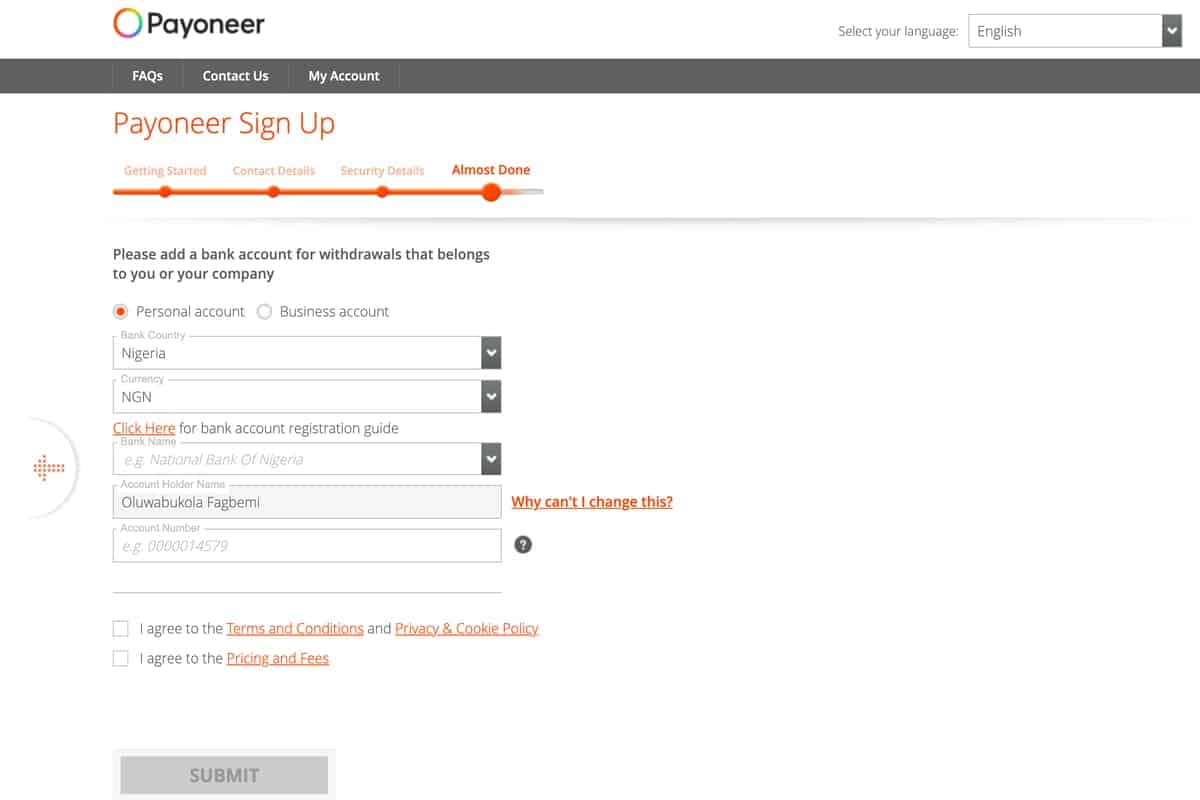
At this stage, you need to enter your account details, that is, where you’re going to be withdrawing your Payoneer funds.
This could be a local bank account or a domiciliary account. So, choose your bank country and choose the currency. After that enter your account numbers and tick the terms and conditions boxes to proceed to the final stage.
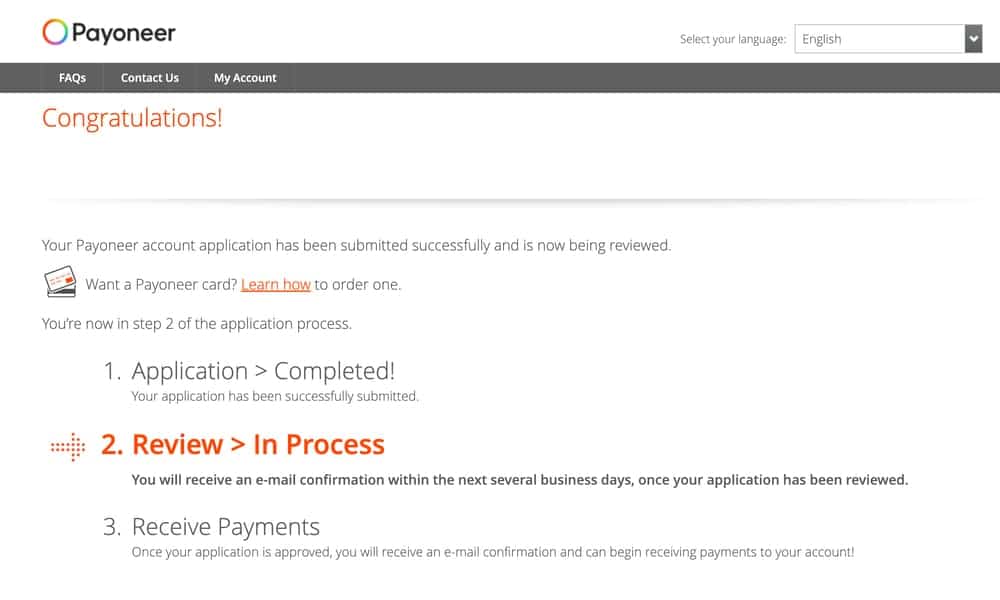
As you can see, your Payoneer account has been fully created, and it under review. Within the next 24hours you’ll receive a mail from Payoneer about the success of your account creation.
Right now, your account is ready to use and can be used to receive payments from all over the worlds. But before then, what you need to do is quickly log in to your account and update your security details.
Step 5. Update and Verify Your Account
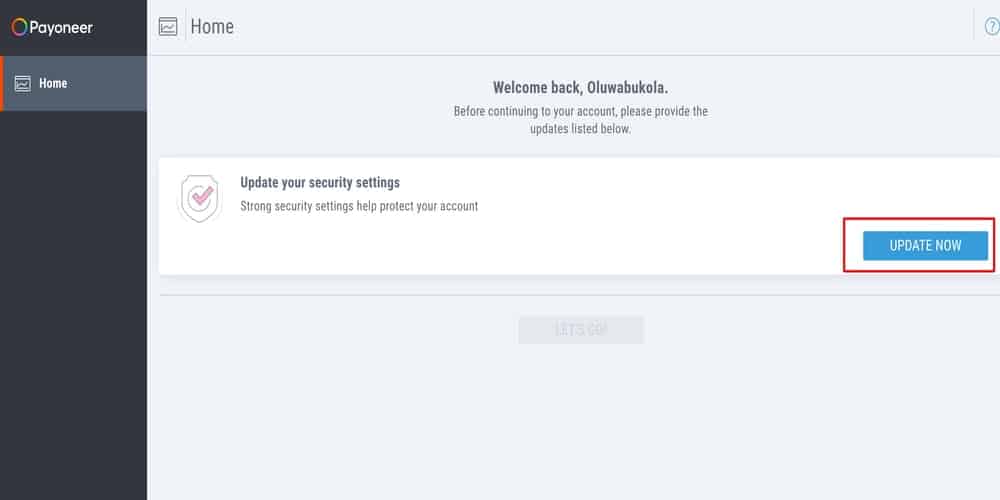
As you can see from the image above, click on the “Update Now” and it will bring out the security questions from the image below. Select the questions you can easily provide answers to. Take for example when is your wedding anniversary date?
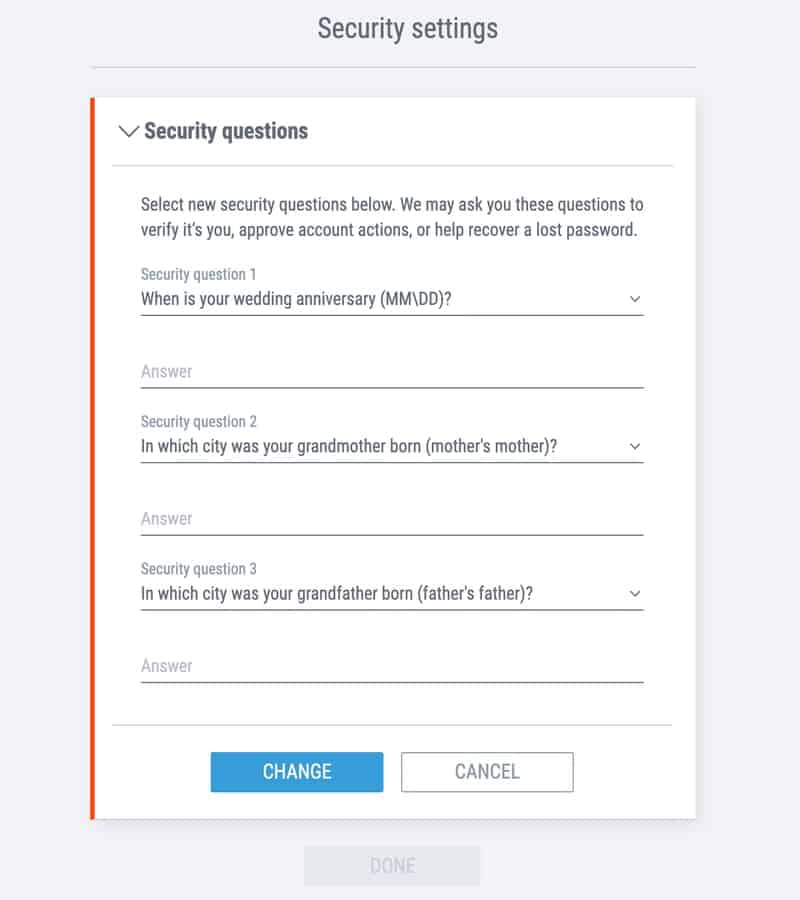
Choose the question, then provide answers to them.
After that, click on the Change Button as you can see from the image above.
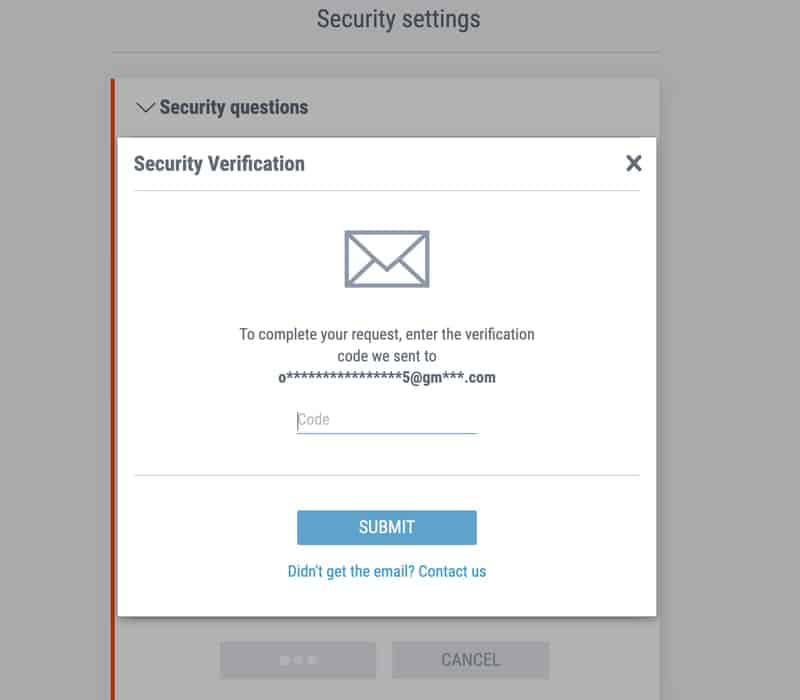
After that, an OTP will be sent to your email address, copy the OTP and paste them in the provided box. Once you’ve done that, click submit and your account will be fully updated and ready to use.
Henceforth you can start using Payoneer to receive funds from your clients or to receive your affiliate earning or even for eCommerce.
How To Request & Receive Payments with Payoneer
Having your account set-up, the next is to start utilizing it. I’ve created a detailed video on how you can receive payment and request payment with your Payoneer account.
Watch the video below.
I talked about using invoice and your normal account details to receieve payment as well as how to easily request payment with email address. watch the video to learn how to do it.
How to Withdraw Money From Your Payoneer Account in Nigeria
There are currently two ways to withdraw your Payoneer funds, this includes withdrawal to your bank account to through the Payoneer ATM card.
The account withdraw is pretty much easy and fast because all you must do is add your bank details and withdraw your funds to it.
The ATM card requires a bit of a process because you’ll have to order it and wait for it and you can also pay a fee if you want them to ship it faster.
If you would prefer to go with the free method, you’ll have to receive up to $3000 before you can request for the free Payoneer card. But before then, you can easily withdraw funds to your local bank account.
I’ve equally added a detailed video on how to do that, you can watch the video below.
Conclusion
As you can see, creating a Payoneer account in Nigeria isn’t that hard and the steps involved aren’t too difficult.
You just need to follow what’s shared here and run with the picture description and before you know it, you will be done creating your Payoneer account.
If you’re yet to create your account don’t forget your $50 sign-up bonus specifically for our blog readers.

![How to Invest in Chipper Cash [Step By Step]](https://smartbizfreedom.com/wp-content/uploads/2022/07/how-tp-invest-in-chipper-cash-768x412.jpg)
![How to Open a Stripe Account in Senegal [100% Full Guide]](https://smartbizfreedom.com/wp-content/uploads/2023/12/Stripe-nepal-18-768x432.jpg)
![Is Piggyvest Legit? [Everything You Need To Know]](https://smartbizfreedom.com/wp-content/uploads/2022/10/Piggyvest-legit-768x362.jpg)
![How to Open a Stripe Account in Trinidad & Tobago [Working Tutorial]](https://smartbizfreedom.com/wp-content/uploads/2023/12/Stripe-nepal-23-768x432.jpg)
![How to Open a Stripe Account in Guam [Working 100%]](https://smartbizfreedom.com/wp-content/uploads/2022/07/Stripe.jpg)
Thanks for the training,God bless you.Pls I’m still having issues with the Payoneer account opening.it gets stuck at stage 2/4.The next button keeps bouncing back.what do I do.Thanks